By Paige Kingsley
As an Amazon Associate I earn from qualifying purchases. This page may contain affiliate links.
Homemade bass fishing lures let you build baits that match your local forage, your water clarity, and your favorite fishing style, all for a fraction of the cost of store-bought options. In this guide, you will learn which lure types are easiest to start with, what tools and materials you need, how to pour soft plastics and tie simple jigs, and how to test your creations on the water. By the end, you should have a repeatable process for making lures that catch fish.
Why Make Your Own Bass Lures?
Most anglers who try homemade bass fishing lures do it for one of three reasons. The first is cost: a single batch of soft plastics or bucktail jigs can yield dozens of baits from materials that would otherwise sit on a shelf. The second is customization. You can match a specific shad or bluegill color, adjust a jig head for a particular depth, or add a scent that your local bass seem to prefer. The third is simply the satisfaction of catching fish on something you built.
Homemade lures also teach you how baits actually work. When you pour a worm and then rig it on a hook, you start to notice how weight placement affects fall rate and how tail shape changes action. That knowledge carries over into buying decisions later. If you are still getting oriented, the article Fishing Lures for Beginners offers a useful overview of lure categories before you start building.
Choose the Right Lure Types to Start With
Not every bait is a good first project. Some require specialized equipment, precise metalwork, or a lot of trial and error. For most beginners, these three categories offer the best balance of simplicity and fish-catching potential.
Soft Plastic Worms and Creature Baits
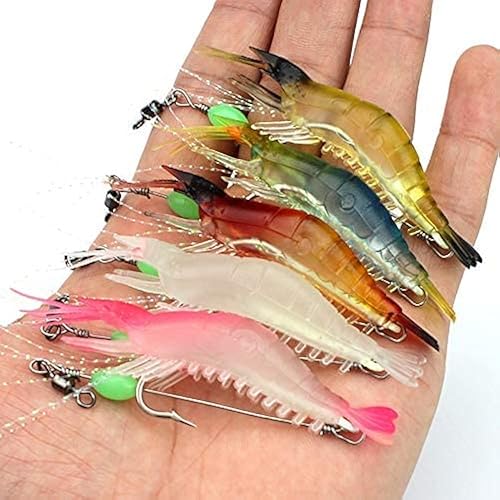
Soft plastic baits are the most popular entry point for homemade bass fishing lures. Plastisol and silicone molds are inexpensive, and a basic worm or creature bait can be poured in a single session. The finished baits work on Texas rigs, Carolina rigs, and drop-shot setups. For rigging ideas once your baits are finished, see Texas Rig Setup with Bullet Weights for Bass Fishing, and for a broader look at plastic designs, Soft Plastic Fishing Lures Explained is a good companion read.
Homemade Jigs
Jigs are arguably the most versatile bass bait you can make. A lead or tungsten jig head, a bucktail or silicone skirt, and a trailer are all you need to build a working jig. Jigs are also forgiving: a slightly uneven paint job or a loose skirt rarely ruins performance. Jig techniques for bass are covered in Jig Fishing Rigs and Techniques for Bass.
Spinnerbaits
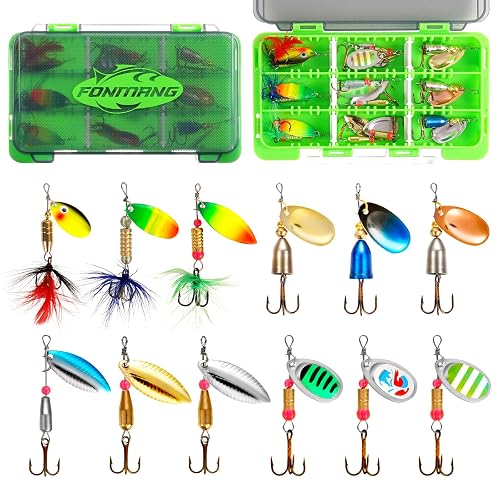
Spinnerbaits require more hardware, including wire forms, blades, and clevises, but they can be assembled with basic pliers. They are a good project once you have some experience. Blade choice changes how the bait flashes and vibrates, so testing different combinations is part of the fun. Fishing approaches for these baits are explained in Spinnerbait Fishing Techniques for Bass and Pike.
Gather Your Tools and Materials
Before you start, assemble a basic workspace. Good preparation prevents wasted material and keeps you safe, especially when working with molten lead or hot plastic.
- A heat-resistant work surface and good ventilation or an open garage door
- A melting pot or ladle designed for lead or plastic, used only for fishing purposes
- Silicone or plastisol molds matched to the bait sizes you want
- Soft plastic color concentrate, scent, and glitter if desired
- Needle-nose pliers, wire cutters, and a small file for trimming flash
- Hooks, jig heads, wire forms, blades, and clevises depending on the bait type
- Nitrile gloves, eye protection, and a fire extinguisher nearby
A mold release agent and a set of plastic containers for storage will also save time. Keep your finished baits organized in a container designed for tackle; Using Utility Boxes for Fishing Lure and Tackle Storage explains setups that work well for soft plastics.
Step-by-Step: Pouring Soft Plastic Baits
Pouring soft plastics is the most common homemade bass fishing lures project, so it is worth mastering the process carefully.
Step 1: Melt and Color the Plastic
Heat the plastisol to the temperature range listed on the manufacturer’s label, typically in the range of 350 to 400 degrees Fahrenheit for many common formulas. Stir gently and avoid overheating, which can degrade the plastic and produce fumes. Add color concentrate a few drops at a time until you reach the shade you want. Hold the plastic up to a light to check how it looks when poured thin.
Step 2: Prepare the Mold
Clean the mold thoroughly and apply a thin, even coat of release agent. Dry-fit the mold to check for air gaps. Pre-warming silicone molds slightly can help the plastic flow into fine details such as worm ribbing.
Step 3: Pour Slowly
Pour the plastic in a slow, steady stream to reduce air bubbles. Fill each cavity to the top and tap the mold gently on the table to release trapped air. Allow the bait to cure for the time specified by the plastic manufacturer, which is often 15 to 30 minutes for basic formulas.
Step 4: Demold and Trim
Once the plastic has set, flex the mold gently to release the baits. Trim any flash with scissors or a small blade. Store baits in a sealed container away from direct sunlight, since heat and UV can cause them to dry out or lose color over time.
Step-by-Step: Tying a Basic Bucktail Jig
A bucktail jig is one of the simplest homemade bass fishing lures to build. The process works well for beginners who want quick results.
- Secure a jig head in a vise or hold it firmly with pliers.
- Apply a thin coat of head cement to the hook shank behind the eye.
- Tie a small section of thread at the base of the jig head to anchor the skirt.
- Cut a small bundle of bucktail or synthetic hair, aligning the tips evenly.
- Tie the hair onto the hook shank, wrapping tightly with thread and building a neat collar.
- Trim the hair to shape, leaving a slight taper toward the rear of the jig.
- Finish with a coat of clear head cement and allow it to dry completely before fishing.
Testing Your Homemade Lures
A lure is only useful if fish respond to it. Start by testing your baits in a calm, shallow area where you can see how they fall, swim, or sit on the bottom. Check for balance: a jig that falls with its head tipped sideways may need a different weight or hook placement. Watch for tears, separations, or hooks that stick out at odd angles.
Keep a simple log of which colors, sizes, and rigging styles produce bites on each body of water. Over time, this log becomes more valuable than any single bait. Owners of homemade gear often report that their best results come from refining a few reliable patterns rather than chasing dozens of new ones.
Comparison of Common Homemade Bass Lure Types
| Lure Type | Difficulty | Main Materials | Best Use |
|---|---|---|---|
| Soft plastic worm | Beginner | Plastisol, mold, color | Texas and Carolina rigs |
| Creature bait | Beginner | Plastisol, mold, scent | Finesse and drop-shot |
| Bucktail jig | Beginner | Jig head, hair, thread | Bottom contact, cover |
| Silicone skirt jig | Beginner to intermediate | Jig head, silicone skirt | Structure and brush |
| Spinnerbait | Intermediate | Wire form, blades, clevis | Reaction strikes, stained water |
Common Mistakes to Avoid
- Overheating plastic. Excess heat can produce fumes and weaken the bait. Use a thermometer and stay within the manufacturer’s range.
- Skipping the release agent. Without it, baits tear when you demold them, wasting material.
- Ignoring weight balance. A jig or worm that falls at the wrong angle will spook fish.
- Overloading hooks. Hooks that are too heavy or too light change the swim and fall of the bait. Match the hook size to the bait profile.
- Working in poor ventilation. Melting plastic and lead should always happen outdoors or in a well-ventilated space.
- Storing baits in heat. Left in a hot car, soft plastics can deform and lose scent.
Tips for Better Results
- Start with two or three colors that match local forage, such as green pumpkin, watermelon, and white.
- Pour a few extra baits as spares, since they tend to get lost or torn during early testing.
- Label containers with the color, scent, and pour date so you can track performance.
- Use snaps or clips for quick changes between baits on the water. A Guide to Fishing Snaps and Clips for Quick Lure Changes covers the options.
- Match your line to the bait. Lighter line improves finesse presentations, and the article Why Fishing Line Diameter Matters for Casting and Sensitivity explains why.
- Clean and inspect baits between trips. Dirt and debris reduce action, and How to Clean Fishing Lures for Better Performance walks through a simple routine.
Recommended gear
A basic silicone mold set makes it easy to pour consistent worms, creature baits, and swimbait-style plastics. Look for molds with clearly defined cavities and a flexible material that releases baits cleanly.
A soft plastic color concentrate kit lets you mix custom shades for matching local forage. Owners often report that a few core colors cover most conditions. View on Amazon
A quality melting pot with a built-in thermostat helps keep plastisol within the recommended temperature range, reducing the risk of overheating. View on Amazon
A set of bucktail jig heads in a range of weights gives you a ready base for building jigs and testing fall rates in different depths. View on Amazon
FAQ
Is it safe to make homemade bass fishing lures at home?
It can be, if you take precautions. Work in a ventilated area, wear nitrile gloves and eye protection, and keep a fire extinguisher nearby. Avoid melting lead indoors. If you are unsure about handling heated materials, consult an experienced angler or a local fishing club for hands-on guidance.
What materials do I need to start?
For soft plastics, you need plastisol, molds, color concentrate, and a melting pot. For jigs, you need jig heads, hair or silicone skirts, and thread with head cement. Start with one lure type to keep your initial investment small.
Do homemade lures catch as many fish as store-bought ones?
They can, especially when matched to local forage and fished with the right technique. Performance depends more on presentation, color, and action than on where the bait was made.
What is the easiest homemade bass lure for beginners?
A soft plastic worm or creature bait is generally the simplest, since it requires only a mold, plastic, and color. Bucktail jigs are also very approachable.
How long do homemade soft plastics last?
Storage conditions matter most. Keep baits in a cool, dark, sealed container. Owners often report that soft plastics stay usable for several seasons when stored well, though they may lose scent and softness over time.
Can I use scent in homemade lures?
Yes. Many anglers add scent concentrate to plastisol before pouring. Use it sparingly, as too much can affect the texture and cure of the plastic.
What hook size should I use for a homemade worm?
Match the hook to the bait length and rig style. Worm hooks in the 2/0 to 4/0 range are common for standard bass worms, but the right size depends on the bait and the cover you are fishing.
Do I need special line for homemade lures?
No, but line choice affects how your bait performs. Lighter line helps finesse presentations, while heavier line handles cover. Check your line diameter against the bait and conditions.
Conclusion
Homemade bass fishing lures are a rewarding way to expand your tackle, customize your baits, and understand how lures work on the water. Start with one simple type, such as soft plastics or bucktail jigs, and focus on safe, careful production. Test your creations, keep notes, and refine the patterns that catch fish in your local waters.

About Paige Kingsley
Paige researches and writes buying guides and how-to articles on freshwater fishing tackle on a budget. Picks are based on product specifications, brand reputation and patterns in owner feedback, and are updated as new models come out.