By Paige Kingsley
As an Amazon Associate I earn from qualifying purchases. This page may contain affiliate links.
3d printed bass lures let you turn a simple design file into a working bait you can tune, paint and rig yourself. In this guide you will learn how to choose a design, set up a printer for lure-grade parts, test the swimming action before you ever cast, and finish and rig your baits so they hold up to largemouth and smallmouth bass. The process takes some patience, but a single print run can produce a dozen custom baits for a small fraction of what tournament-level hard baits cost.
Why Anglers Print Their Own Bass Lures
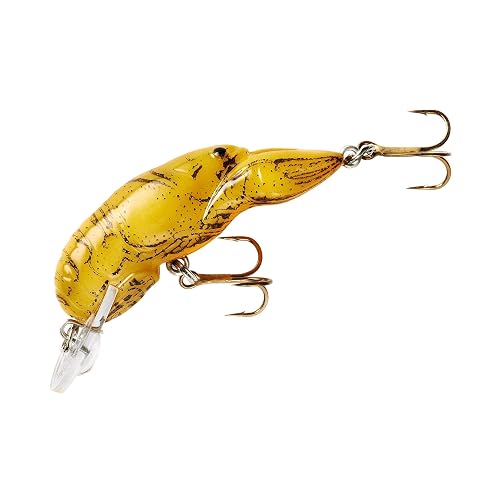
The appeal is mostly control. A printed lure lets you match a specific forage, such as a shad profile in a reservoir or a crawfish silhouette in a rocky creek, and then adjust weight, lip angle and body length until the bait behaves the way you want. Many anglers also use printing to fill gaps in their box, like a slow-sinking jerkbait for cold water or a compact topwater for pressured fish. The tradeoff is time. Designing, printing, testing and tuning a lure takes several evenings, so most people start with a few proven designs rather than trying to invent their own from scratch.
Step 1: Choose a Design and Understand Lure Action
Start with a model you can actually find online. Open-source lure files and community-shared STL files cover popular profiles like minnows, swimbait bodies, popper bodies and wake baits. When you evaluate a file, look at three things before you print:
- Body profile: Deep-bodied baits wobble more and suit slow retrieves. Slim, long baits run straighter and suit fast retrieves or long casts.
- Lip or diving bill: The bill angle determines how deep the bait runs and how aggressively it wobbles. A short, steep lip dives quickly; a long, shallow lip stays higher in the water column.
- Internal cavity: A clean, hollow channel for weights, a split ring or a hook hanger saves you from drilling later and keeps the center of gravity where the designer intended.
Lure action comes from the balance between body shape, lip, and weight placement. If a design doesn’t come with notes on how it swims, expect to do some tuning after the first print.
Step 2: Set Up Your Printer and Material
Most bass lure prints are made with PLA or PETG. PLA is easy to print and holds fine detail, but it can become brittle and may soften in a hot car. PETG is tougher, handles impacts from rocks and fish teeth better, and tolerates warmer water and sun exposure. Many anglers use PETG for the body and reserve PLA for test prints.
Recommended print settings
Manufacturers of common desktop printers and filament brands usually publish starting profiles, and the numbers below are typical starting points rather than guarantees. Adjust them for your machine and filament.
| Setting | PLA starting point | PETG starting point |
|---|---|---|
| Layer height | 0.16 to 0.20 mm | 0.16 to 0.20 mm |
| Wall count | 4 perimeters | 4 to 5 perimeters |
| Infill | 15 to 25 percent gyroid | 20 to 30 percent gyroid |
| Nozzle temperature | 200 to 215 °C | 230 to 245 °C |
| Print speed | 50 to 60 mm/s | 40 to 50 mm/s |
| Orientation | Lip facing up, flat side down | Lip facing up, flat side down |
Infill and wall count matter more than most beginners expect. Higher infill adds weight and strength, but it also changes buoyancy, so keep notes on every test print.
Tools and supplies checklist
- A 3D printer with a heated bed and a reliable first-layer setup
- PETG or PLA filament in a neutral or natural color for primer
- Slicer software with a fine-tuning or infill-control option
- Tungsten or brass weight inserts sized to fit the internal cavity
- Split rings, hook hangers and a size range of treble hooks
- Fine sandpaper (220 to 400 grit) and a sealer or clear coat
- Acrylic paint, holographic film or waterslide decals for finish
- A bucket or sink for float and sink tests
Step 3: Print, Remove Supports and Inspect
Print one lure first, and print it flat with the lip up. This avoids most supports, which leave rough scars on the lip and belly. If the design needs supports, use tree-style supports set to touch only the build plate or only the areas that need them, and remove them carefully with a flush cutter. Check the lip for warping and the hook slot for stringing. Fix small problems at this stage; filing a lip after painting is far harder.
Step 4: Test Buoyancy and Swimming Action
Before you drill, weigh, or paint anything, test the bare body. Fill a clear container with water deep enough to cover the lure, drop it in and note whether it floats, suspends or sinks. Then pull it through the water with a rod and line at the speed you expect to fish. A few practical checks:
- Floats at rest: Good for topwater and suspending wake baits, but it will need a weight if you want it to sink.
- Sinks slowly: Good for finesse and cold-water presentations.
- Wobbles on a slow pull: The body and lip are working together.
- Rolls sideways or runs crooked: Move the weight forward or back in small steps, or adjust the lip angle.
Make one change at a time and record it. Tungsten shot or a small tungsten insert moved a few millimeters can shift a bait from nose-down to level, and that is often enough.
Step 5: Finish, Seal and Rig the Lure
Sand the body lightly to remove layer lines, then apply a primer or sealer. Paint in thin coats and let each one cure. Finish with a clear coat, which protects the paint from scraping against rock and wood. Holographic film or decals add flash, and a few anglers prefer a simple color-matched body with a painted eye and gill line.
For rigging, install split rings at the nose and tail, then add treble hooks sized to the body. Bass lures commonly use size 2 to 4 trebles on mid-sized baits, though many anglers swap in stronger hooks for largemouth in heavy cover. If you want to change hooks or colors quickly, a snap or clip saves time. The article on A Guide to Fishing Snaps and Clips for Quick Lure Changes covers options in more detail. You can also read How to Rig Your Tackle for Different Fishing Lures for matching rigs to conditions.
Common Mistakes to Avoid
- Skipping the water test. A bait that looks right on the bench can roll or dive wrong in the water.
- Using weak hooks. Thin wire bends on bass, especially on big fish.
- Ignoring material choice. PLA left in a hot vehicle can warp, and a warped lip ruins the action.
- Adding too much weight at once. Small tungsten additions have large effects.
- Painting before sealing. Paint without a sealer chips quickly on rocks.
Tips for Better Results
- Print a few copies of the same design so you can compare action directly.
- Keep a notebook with infill, weight, hook size and water test results.
- Match color to your local forage and water clarity: natural tones for clear water, high-contrast tones for stained water.
- Store finished baits in separate compartments so hooks don’t tangle. A divided box or the ideas in Using Utility Boxes for Fishing Lure and Tackle Storage work well.
- Think about the rest of your setup. Rod, reel and line choices affect how a bait casts and runs. How to Match Your Rod, Reel, Line and Lures explains how to pair them.
Recommended gear
Several items make the printing and finishing process easier. Look for these categories rather than a single model if you are just starting out.
- Tungsten weight inserts: Tungsten is denser than lead, so a small insert adds weight without making the bait bulky. View on Amazon
- PETG filament in natural color: A tough, impact-resistant material for lure bodies that handles sun and water well. View on Amazon
- Split rings and hook hangers: Stronger split rings reduce the chance of a fish straightening your connection. View on Amazon
- Clear lure coat or epoxy finish: Protects paint and decals from abrasion. View on Amazon
FAQ
What filament is best for 3d printed bass lures?
PETG is generally the better choice for lures used in real fishing because it is tougher and handles sun and impacts better than PLA. PLA is fine for test prints and for lures you only use in mild conditions.
Do 3d printed bass lures actually catch fish?
Yes, many anglers report catching bass on printed baits, though results depend on design, action and presentation. Testing the swimming action before fishing is what separates a working lure from a decorative one.
How do I add weight to a printed lure?
Most designs include an internal cavity or channel. Insert tungsten or brass weights and secure them with a small amount of epoxy or a fitted cap. Move weight in small steps during testing.
What infill should I use?
A gyroid pattern at 15 to 30 percent infill is a common starting point. Higher infill adds strength and weight, so consider how it affects buoyancy in your water test.
Are printed lures safe for fish?
Use non-toxic materials and avoid paints or finishes containing heavy metals. Check that any weights are tungsten or brass rather than lead, which is restricted in many areas. Check local fishing regulations for any specific rules.
Why does my lure roll on its side?
This is usually a weight or balance issue. Move the weight forward or back, or adjust the lip. Small changes often fix it.
How long does a printed lure last?
Durability depends on material, finish and how hard it is fished. A well-sealed PETG bait can last through many seasons of normal use, but expect to replace hooks and touch up paint regularly.
Conclusion
3d printed bass lures reward patience and careful testing. Choose a proven design, print in a tough material, and test buoyancy and action before you finish the bait. Keep notes on every change, and you will build a box of custom lures that suit your local water.
Related reading
- Texas Rig Setup with Bullet Weights for Bass Fishing
- Spinnerbait Fishing Techniques for Bass and Pike
- Soft Plastic Fishing Lures Explained

About Paige Kingsley
Paige researches and writes buying guides and how-to articles on freshwater fishing tackle on a budget. Picks are based on product specifications, brand reputation and patterns in owner feedback, and are updated as new models come out.